
In this guide · 10 sections
Creating a competition on RecTrack takes about ten minutes. Most of that is answering questions you already know the answer to — what sport, what nights, how much. But three or four of the choices are genuinely load-bearing, and knowing which ones they are before you start is the difference between a setup you never touch again and one you spend week two undoing.
This is the whole path, in order: the nine setup steps, what each option actually changes, and then everything that happens after you hit create — publishing, opening registration, building the field, and generating a schedule. The screenshots are from a real setup of an eight-team co-ed rec basketball league, but every screen here is the same whether you are running volleyball sixes, a pickleball tournament, or a corporate cornhole ladder.
Step 0Before you open the wizard
A competition always lives inside an organization — your league, club, rec department, or company. If you have not created one yet, that is the first thing the dashboard asks you to do, and it takes one screen. Everything after that hangs off it: your competitions, your members, your payouts.
Once you have an organization, open it from the sidebar and choose Competitions → New competition. You land on a nine-step wizard with a progress bar across the top. You can click back to any step you have already cleared, and nothing is saved to your organization until the final screen — so exploring is free.

What to have handy
- Your dates. First game day, last game day, and the date you want signups to close.
- Your weekly windows. The days and hours you have the gym, court, or field booked. The scheduler will not put a game outside them.
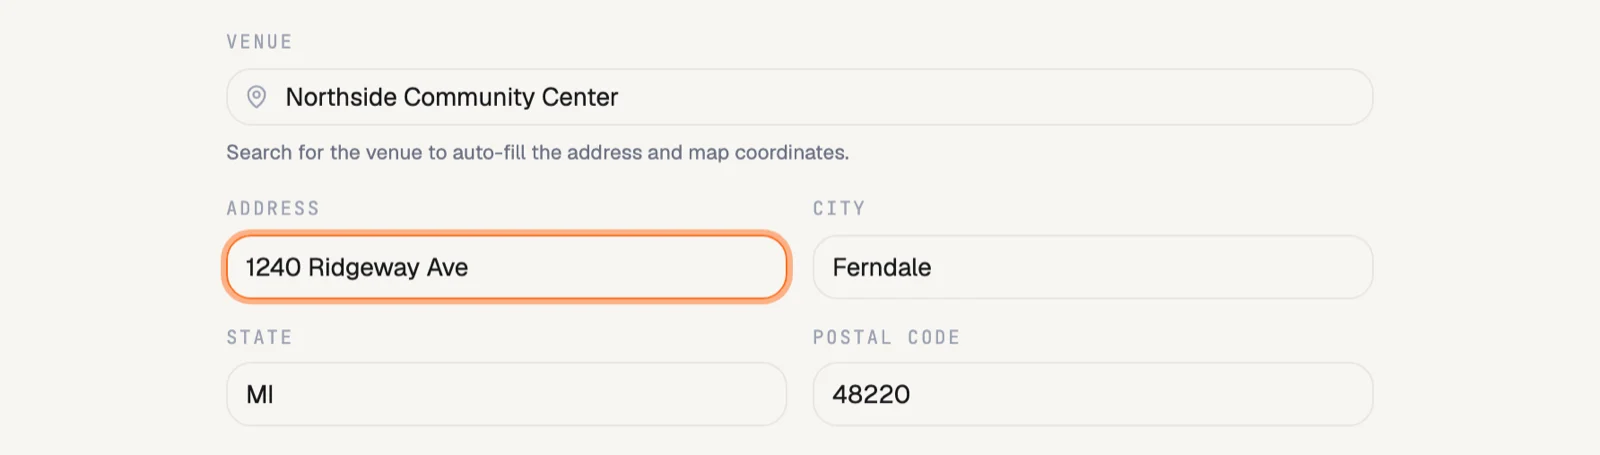
- Your venue. Search finds it and fills the address and map pin for you, so the name is enough.
- Your price, if any. And whether it is per player or per team. If you have not settled this yet, our guide on what to charge for a league works the number out from your cost sheet.
The big oneThe decision that shapes everything else
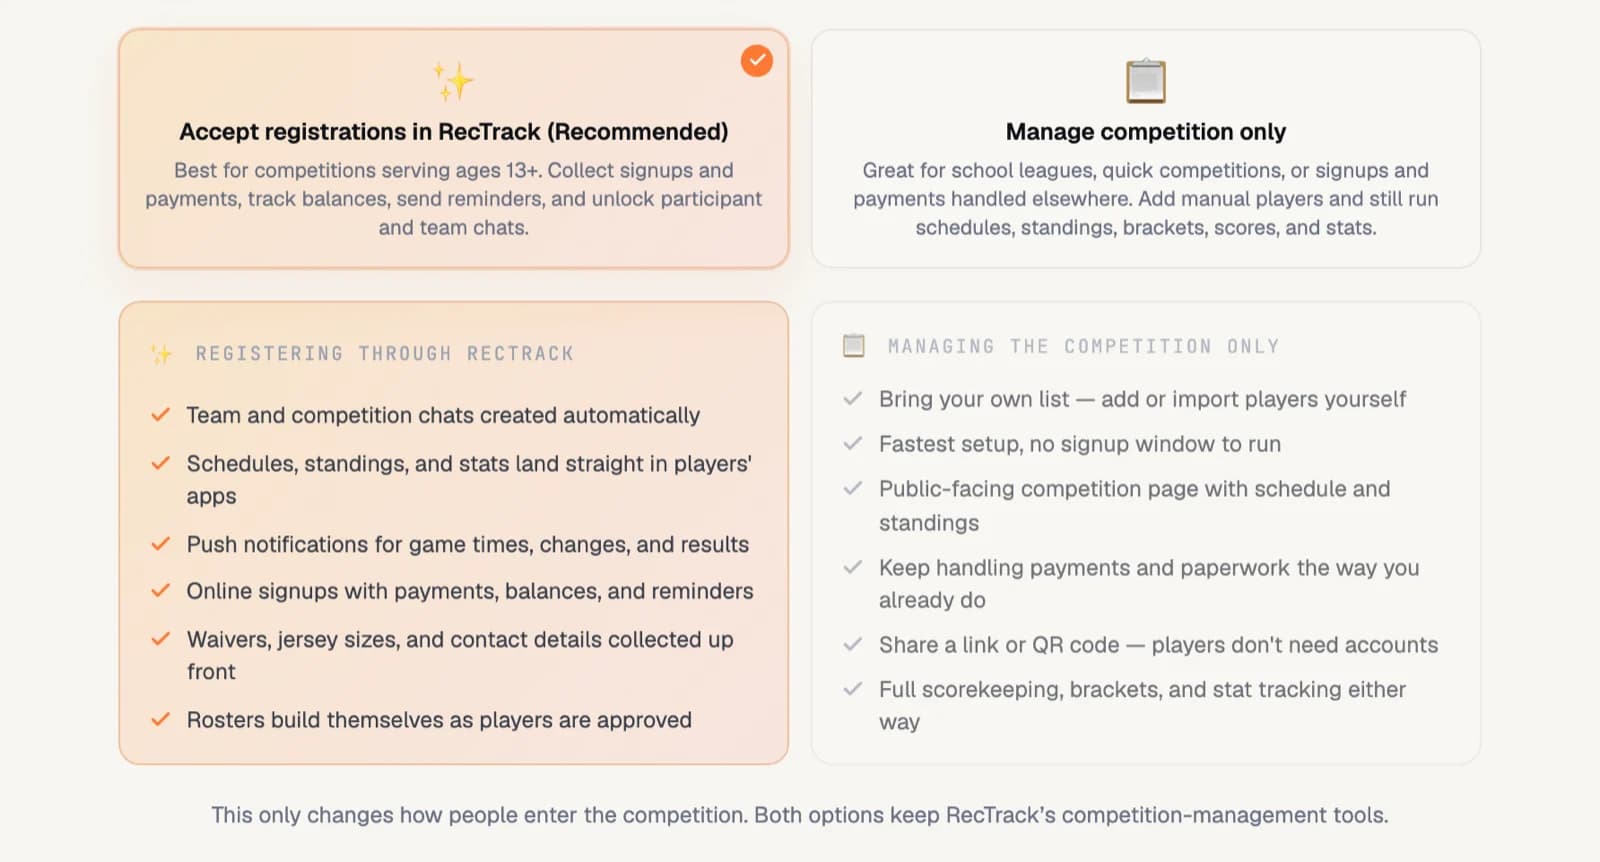
Step two asks how participants get into your competition, and it is the only question in the wizard worth thinking hard about. Everything downstream — whether there is a signup window, whether you collect money, whether players get an app, how rosters get built — follows from it.
Option A: accept registrations in RecTrack
Players sign up through a link or QR code you share. They create an account, join as a team or an individual, e-sign your waiver, and pay if there is a fee. As you approve them, rosters build themselves.
Choosing this turns on the parts of RecTrack that need a player account:
- Online signups with payments, balances, and automatic reminders
- Team and competition chats, created for you as rosters fill
- Push notifications for game times, changes, and results
- Waivers, jersey sizes, and contact details collected at signup
- Schedules, standings, and personal stats in every player's app
The trade-off is that it asks something of your players: an account, and for paid leagues, a card. RecTrack registration is built for participants aged 13 and up.
Option B: manage the competition only
You bring your own list. Add players manually or import a roster, and run the competition exactly the same way — schedule, standings, brackets, live scoring, stats — without anybody signing up for anything.
This is the right call more often than people expect:
- School and youth leagues, where the participants are under 13 or where the district already has its own enrollment.
- Signups you already run elsewhere — a Google Form, a spreadsheet, a payment link, or a front desk taking cash.
- Corporate and one-day events, where teams are already decided and there is no window to run.
- Anything you want live this afternoon. It is the fastest path from nothing to a published schedule.
| Register in RecTrack | Manage only | |
|---|---|---|
| Players need an account | Yes | No |
| Online payments and balances | Yes | Handled by you |
| Signup window to run | Yes | No |
| Team and competition chats | Yes | — |
| Push notifications | Yes | — |
| Public page, schedule, standings | Yes | Yes |
| Live scoring, brackets, stats | Yes | Yes |
| Fastest to launch | — | Yes |
Both options keep the competition-management half of RecTrack. The difference is only in how people get in.
Steps 1–7Walking the nine steps
1. Sport and format
Sixteen sports ship with a full rulebook — periods, scoring, roster bounds, infractions, standings, and the stat set a scorekeeper can record. Picking one loads all of that, so the Rules step later is tweaking rather than building.
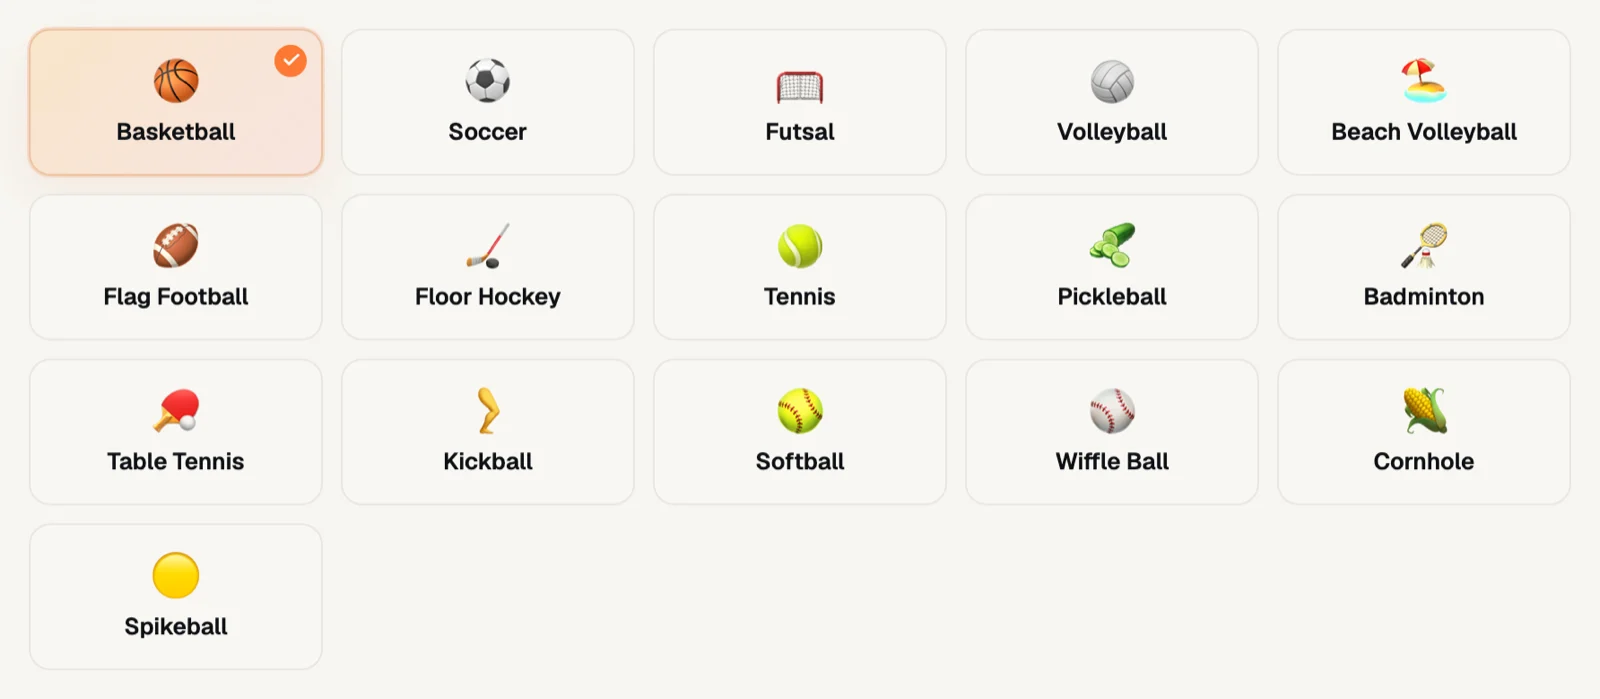
Below the sports, the format question: a league plays an ongoing season with standings, and a tournament is a bracket where you win and advance or lose and go home. This changes the language throughout the rest of the wizard — a league asks for season dates and weekly game times, a tournament asks for an event window and availability windows.

3. Name, description, and banner
The name is what players search for and what shows on every schedule and share card, so make it specific: Sunday Night Hoops beats Basketball League, and it beats Fall 2026 Basketball League Division B too. The description is the pitch on your public page — say the format, the night, the level, and what the fee covers. Add a banner if you have one; it becomes the header of the public page and the image on shared links.
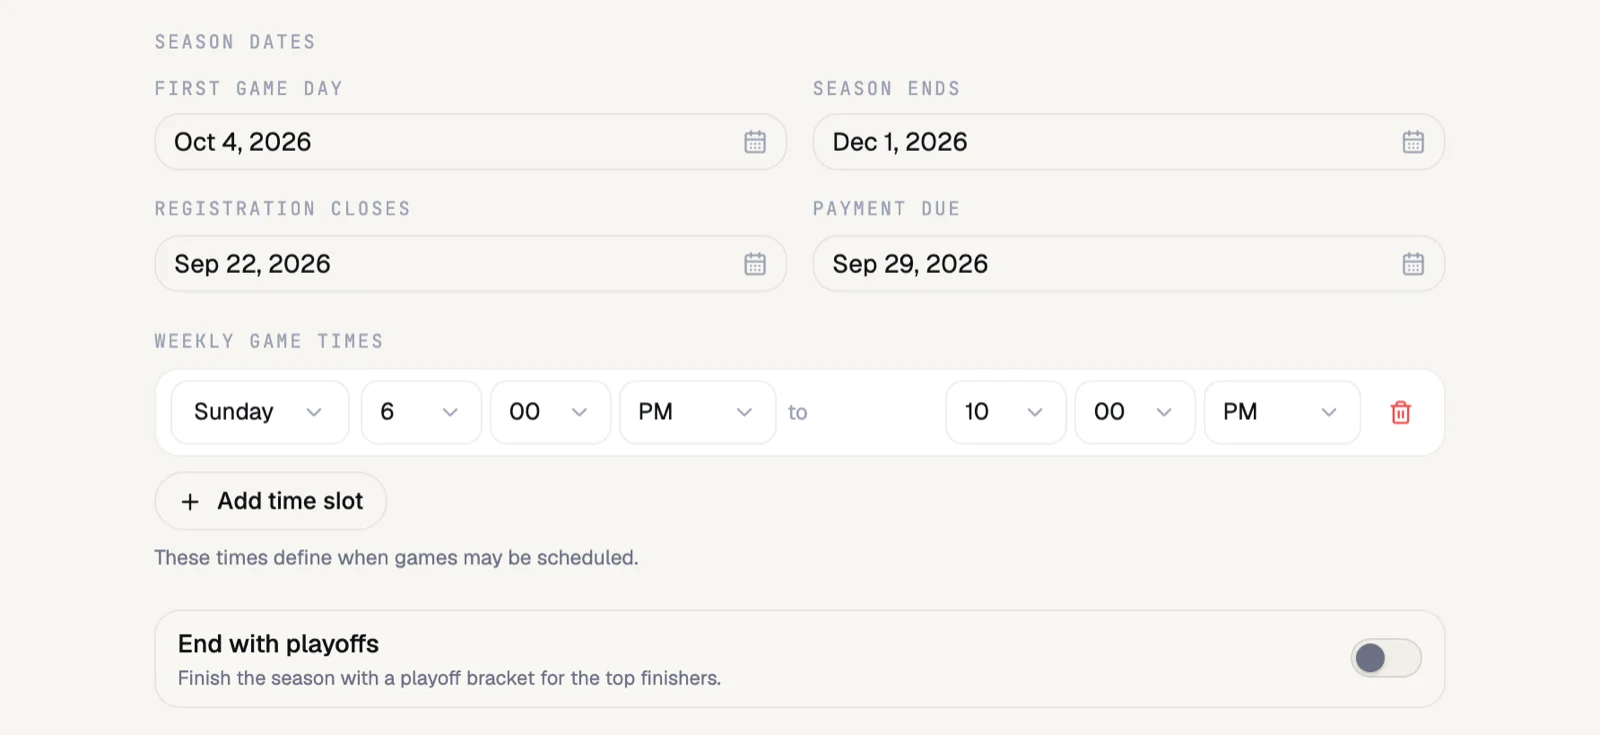
4. Dates and weekly game times
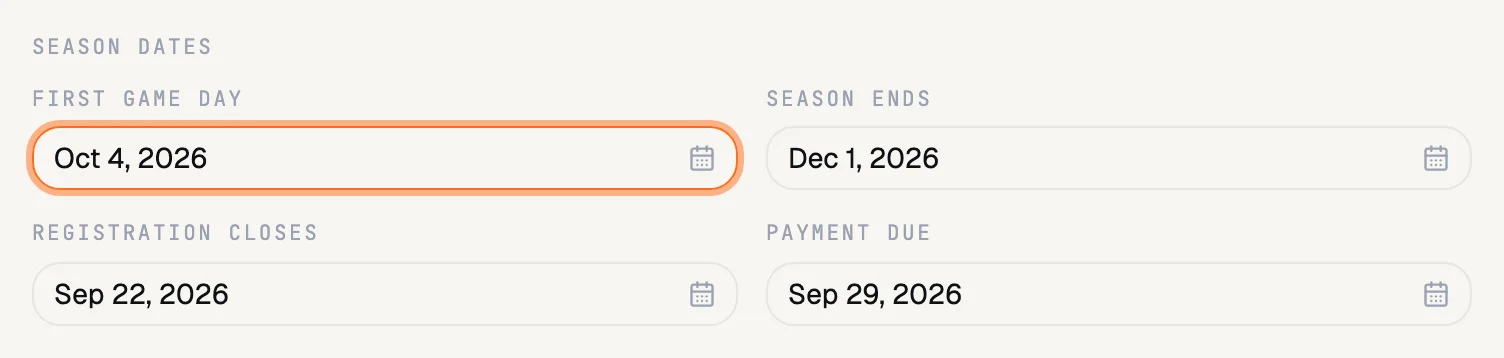
Four dates for a league with RecTrack registration: first game day, season ends, registration closes, and payment due. The two deadlines have to land on or before your first game day, which is the software quietly stopping you from taking a signup after the season starts.
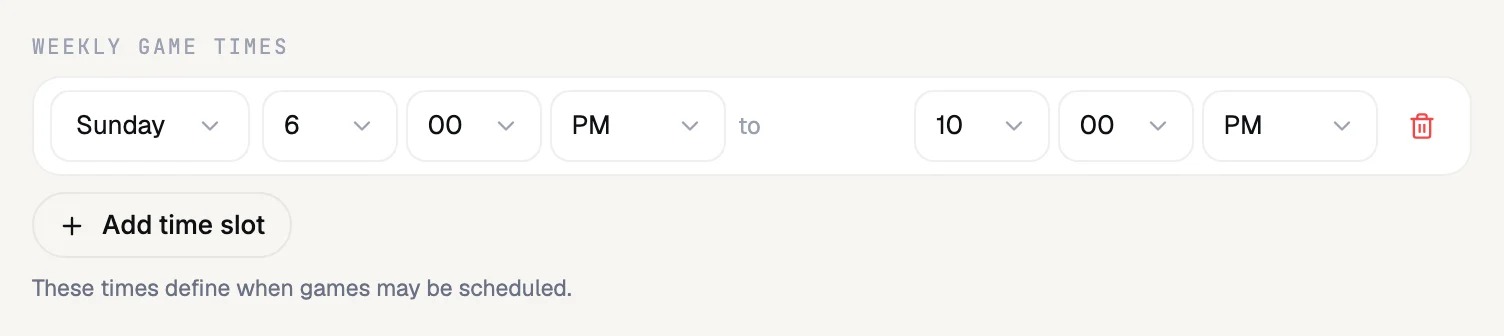
Then weekly game times — the days and hours games are allowed to be played. This is not a schedule, it is a fence: the scheduler will only ever place a game inside these windows. Add one row per day you have the space.
Leagues also get an End with playoffs toggle here. Turning it on now just tells everyone what the season builds toward — you generate the actual bracket at the end, when you know the seeds.
5. Entry format, pricing, and signup requirements
Entry format is what a single entry contains, and the options come from the sport: teams for basketball and soccer, singles and doubles for tennis and pickleball, groups for the sports that carry them.

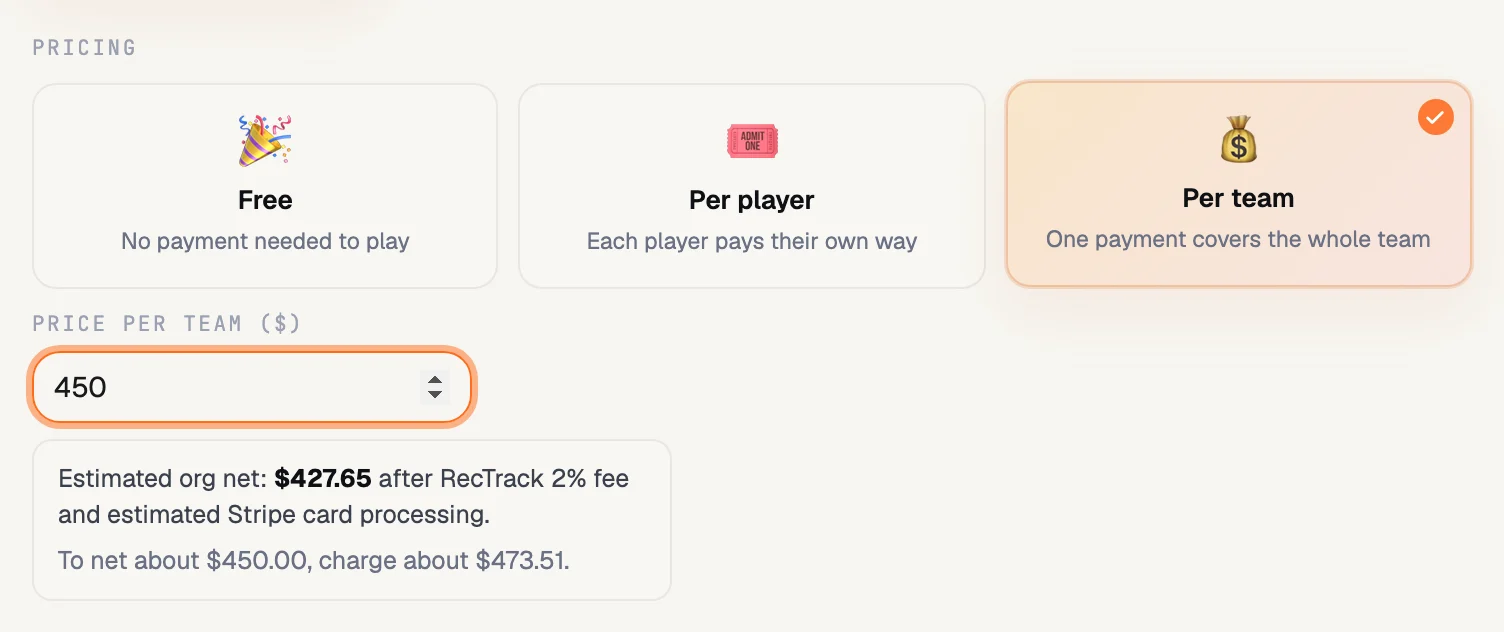
Pricing is free, per player, or per team. Per team is simpler to collect and puts one captain in charge of chasing their own roster; per player means nobody fronts money for a friend who flakes. Type a price and RecTrack shows what actually lands in your account after its 2% platform fee and Stripe’s card processing — plus what to charge to net a round number.
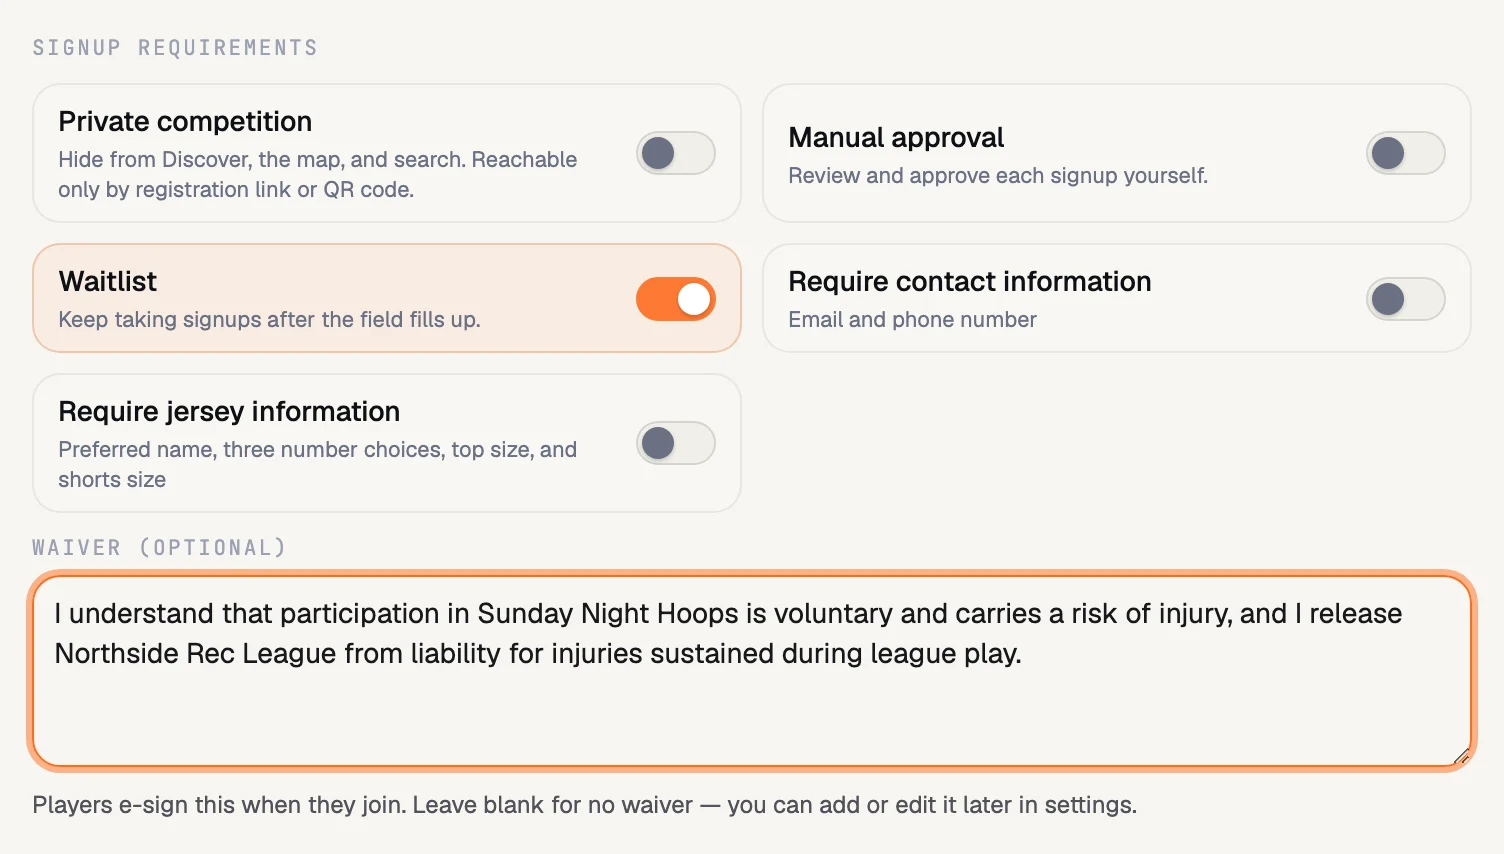
Then the signup requirements, which are five toggles and a waiver box. These are the settings organizers most often wish they had turned on:
- Private competition hides it from Discover, the map, and search. It stays reachable by link or QR code and still shows on your organization’s profile — the right setting for a corporate league or an invite-only event.
- Manual approval makes every signup wait for your yes. Worth it for a competitive division or anywhere you are balancing skill; skip it for a first-come league where it just adds a queue you have to work.
- Waitlist keeps taking signups after the field fills. Leave it on. Teams drop, and a waitlist is the cheapest possible replacement pipeline.
- Contact information collects an email and phone number. Turn it on if you will ever need to reach a player about a cancellation on a Sunday afternoon.
- Jersey information collects preferred name, three number choices, and top and shorts sizes. Only useful if you are actually ordering jerseys — but if you are, collecting it at signup saves a week of group texts.
6. Skill level, division, and capacity
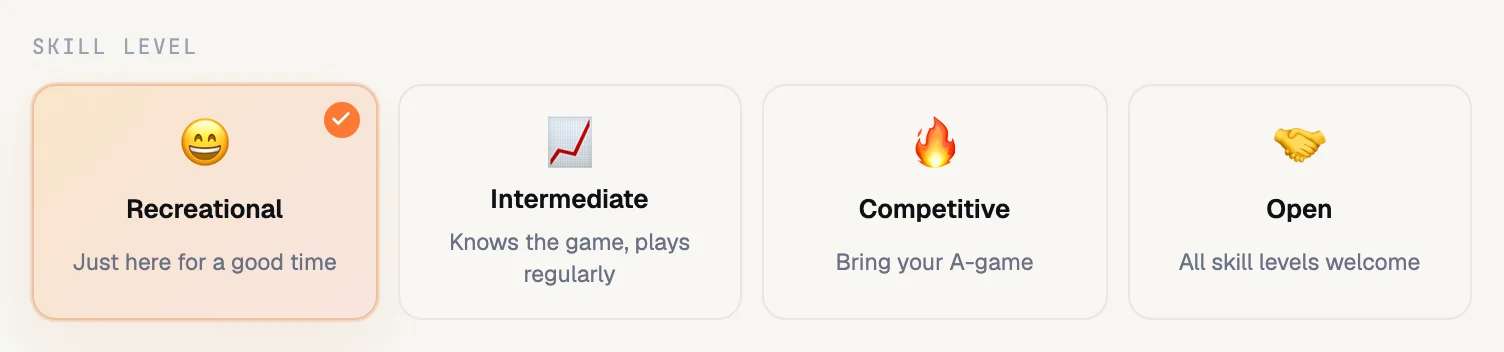
Skill level and division are how players filter Discover, so they are really a recruiting setting. Be honest with them: a competitive league labelled recreational fills fast and then loses half its field by week four.
Capacity is three numbers: the minimum and maximum players an entry can carry, and the maximum number of entries. Max entries is the one that matters — it is what closes signups and what turns the waitlist on. Set it from your slot math, not from optimism.

7. Venue
Search for the venue by name and RecTrack fills the address and the map coordinates from it. The coordinates are what put you on the Discover map and what tell a player how far away you are, so it is worth using the search rather than typing the address by hand.
Step 8House rules and how much to track
Step eight looks intimidating and mostly is not: the standard rules for your sport are already loaded, and the honest advice for a first season is to change nothing except the one setting at the top.
That setting is stat tracking, and it decides how much work a scorekeeper does on a Sunday night.
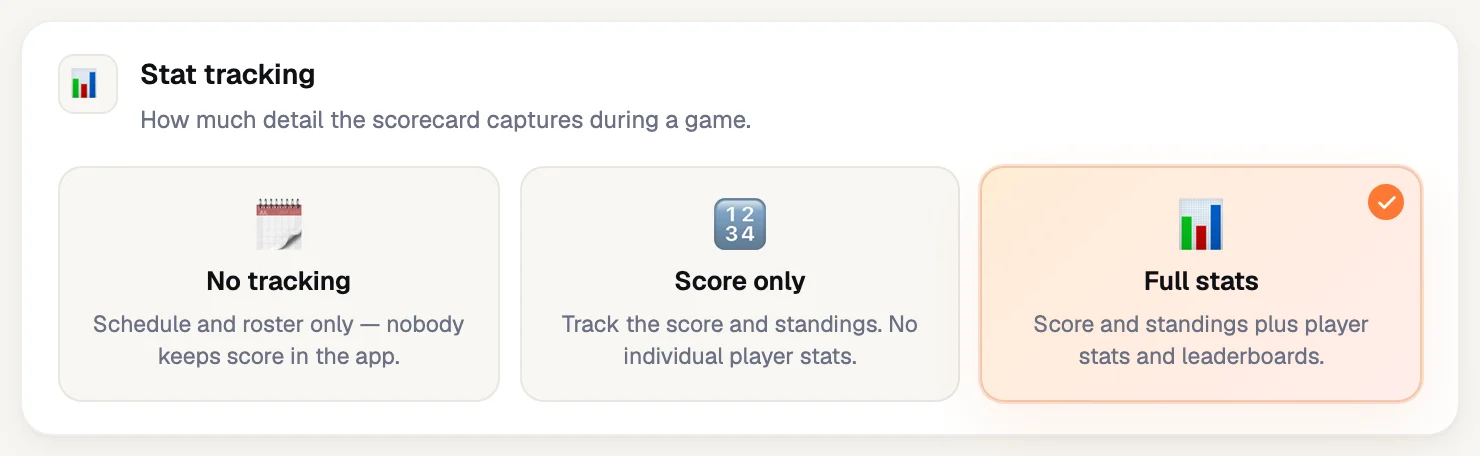
| Mode | Scorekeeper does | Players get |
|---|---|---|
| No tracking | Nothing during the game | Schedule and rosters |
| Score only | Taps the score | Standings and results |
| Full stats | Taps each recorded action | Personal stats, leaderboards, trends |
Full stats is the one players love and the one that quietly needs a volunteer with a phone and their head in the game for an hour.
Below that sit the rule groups themselves — game length, scoring, roster bounds, how standings are ranked, and fouls and penalties. Every field is preloaded with the standard for your sport and every one of them is editable, now or later in Settings.
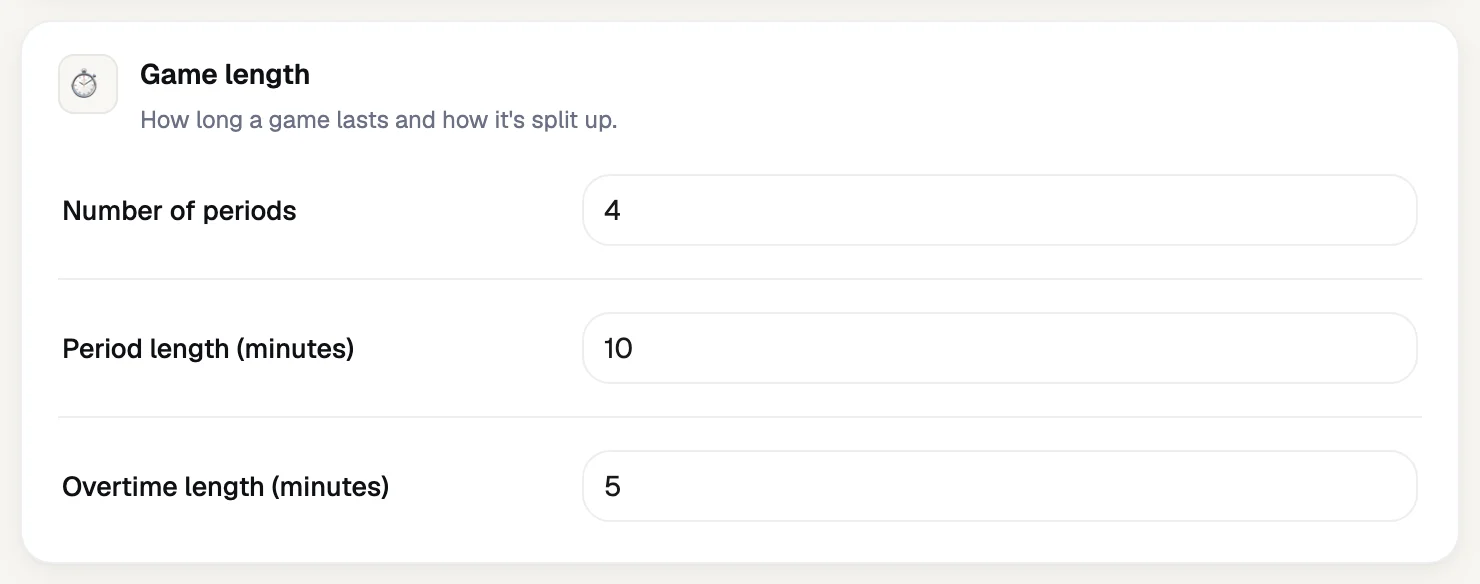
Two of these are worth a moment even in a first season. In Scoring, decide whether ties are allowed and what breaks them — a rec league that allows ties saves itself a lot of late nights. In Standings, decide how teams are ranked before anyone plays a game, because every week-ten argument is really an argument about a week-one rule.
Step 9Review, create, and what you get
The last step is a single screen listing everything you chose. Read the dates and the pricing lines properly — those are the two that hurt to get wrong — then hit Create competition.
What you get is a draft. Only your organization can see it. Nothing is listed, nobody can register, and no notification has gone anywhere. You also get two links immediately:
- A registration link and QR code, which survives name and slug changes, so you can put it on a flyer today and rename the league tomorrow.
- A public competition page at your own organization’s URL, which goes live the moment you publish.
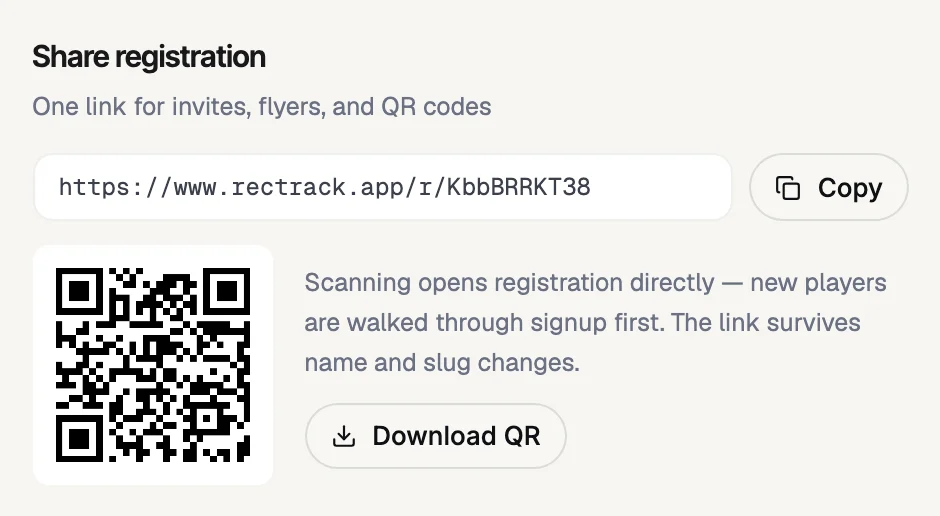
Create your organization, run the nine steps, and have a draft competition with a shareable registration link in about ten minutes.
NextPublishing and opening registration
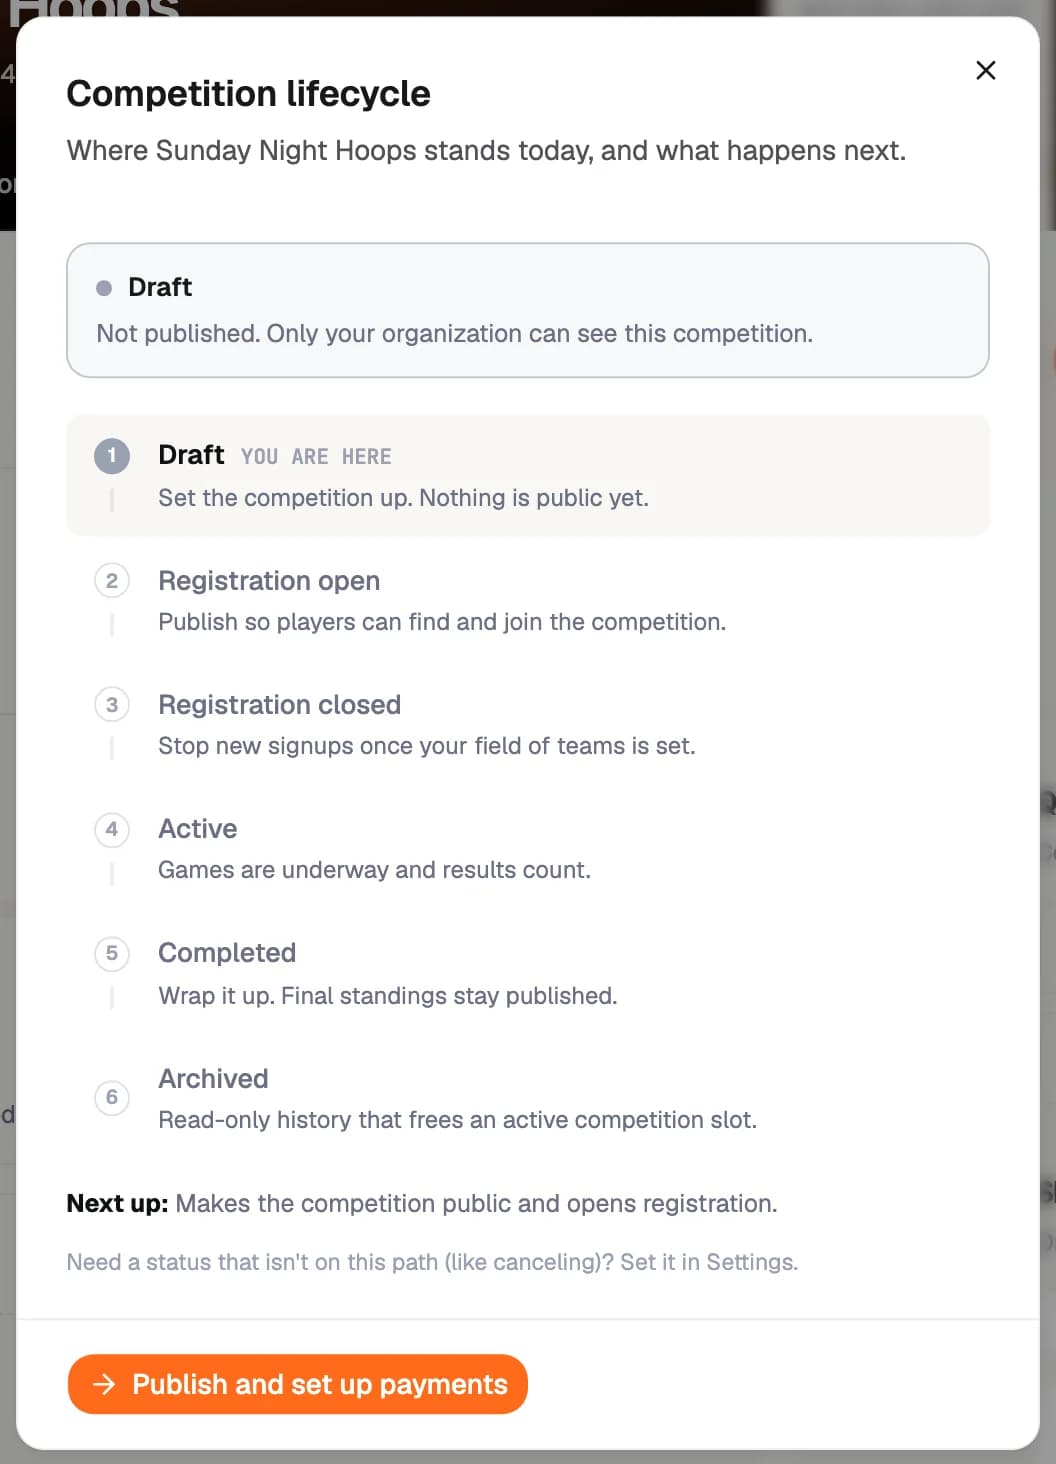
Every competition moves along a fixed ladder, and the competition home page shows you where you are plus the single next thing to do. You never have to work out which status to pick.

Click the pill and you get the whole ladder, with your position on it:

ThenFilling the field
How you build the field depends on the choice you made in step two, and the two paths converge quickly.
If players register through RecTrack
The Registrations tab is your inbox. It counts pending, approved, waitlisted, and open balances, and each registration opens a panel with the player’s details, waiver, and payment state. Approve, decline, or promote from the waitlist there. Approved registrations flow onto rosters on their own.
- Turn on manual approval only if you will actually work the queue.
- Watch the open-balance count — approved but unpaid is the number that bites in week one.
- Promoting from the waitlist is one click when a team drops.
If you manage the competition yourself
Go to Teams → New team and create them. A team needs a name; a logo and a captain are optional, and RecTrack generates a mark from the initials if you skip the logo.
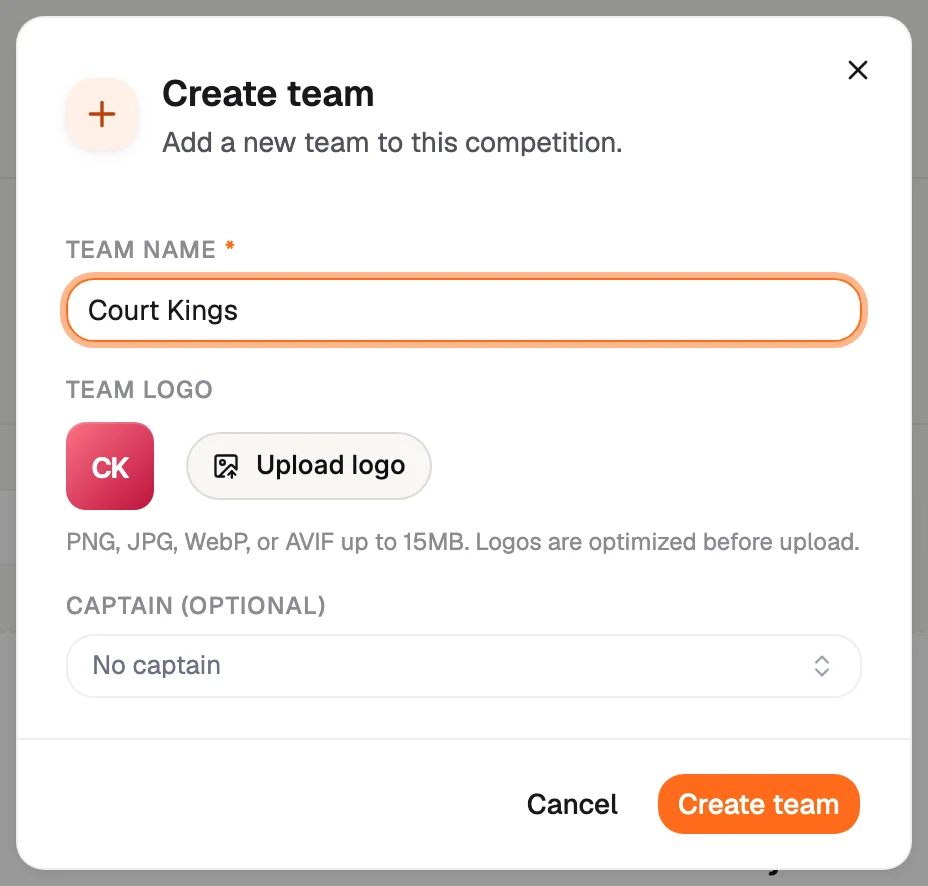
Then add players from the Players tab. Manual players are roster identities you own: they appear in the schedule, in standings, in the box score, and in stats, without ever creating an account. You can mix them freely with players who did register.
A team that exists in RecTrack is a team the scheduler can use. Until then, the Games tab has nothing to work with.
ThenGenerating the schedule
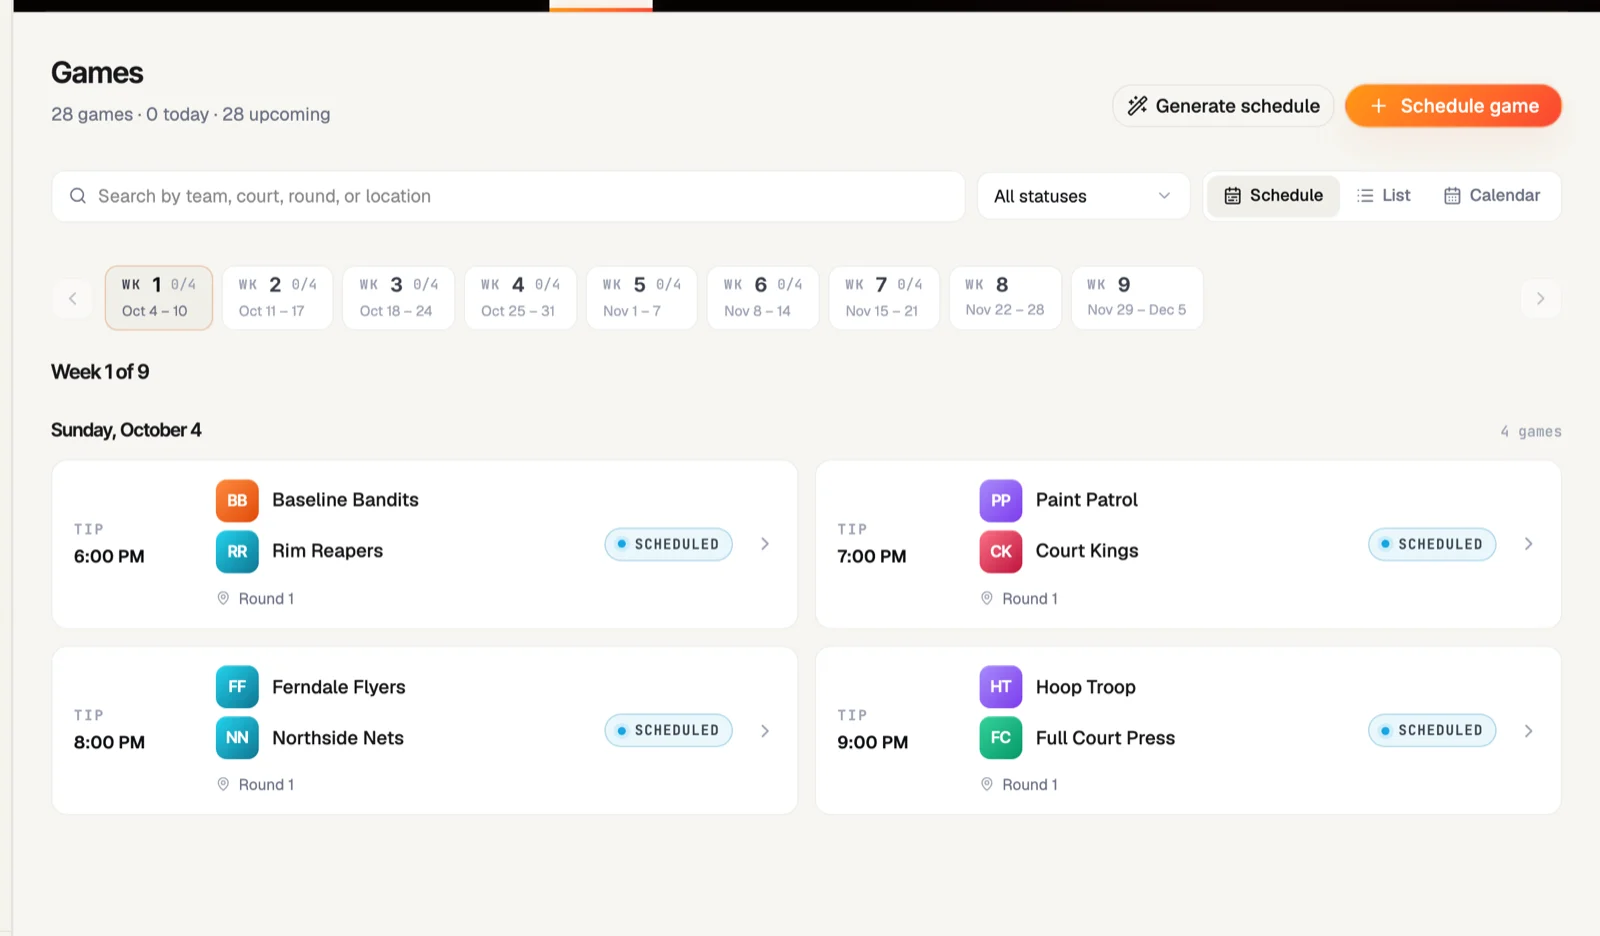
With teams in place, open Games → Generate schedule. The generator is five short steps and it builds a fair round robin inside the weekly windows you set back in step four.
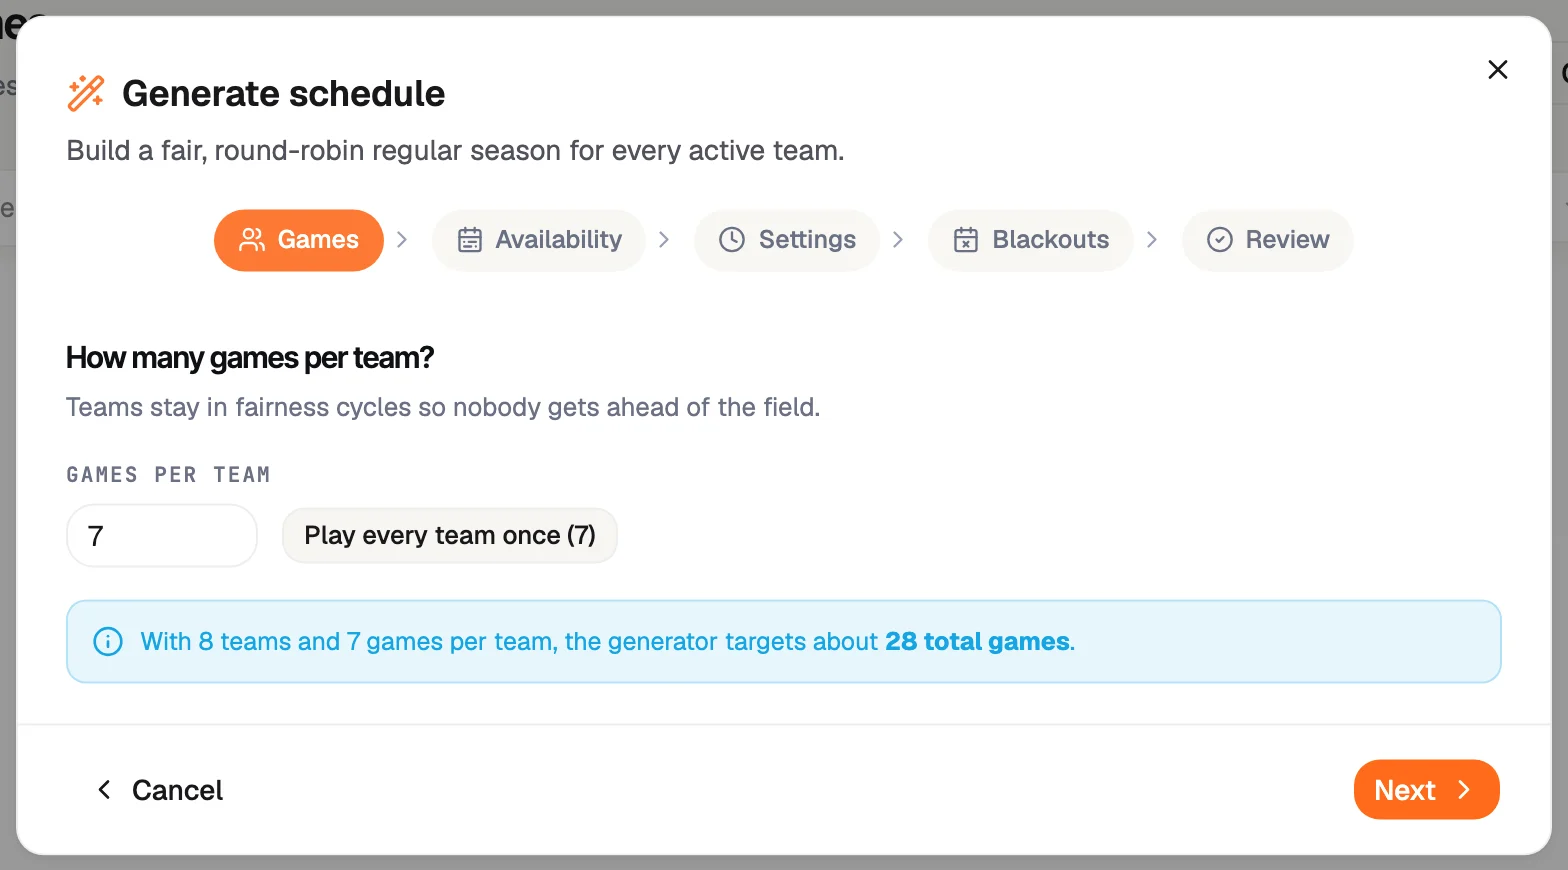
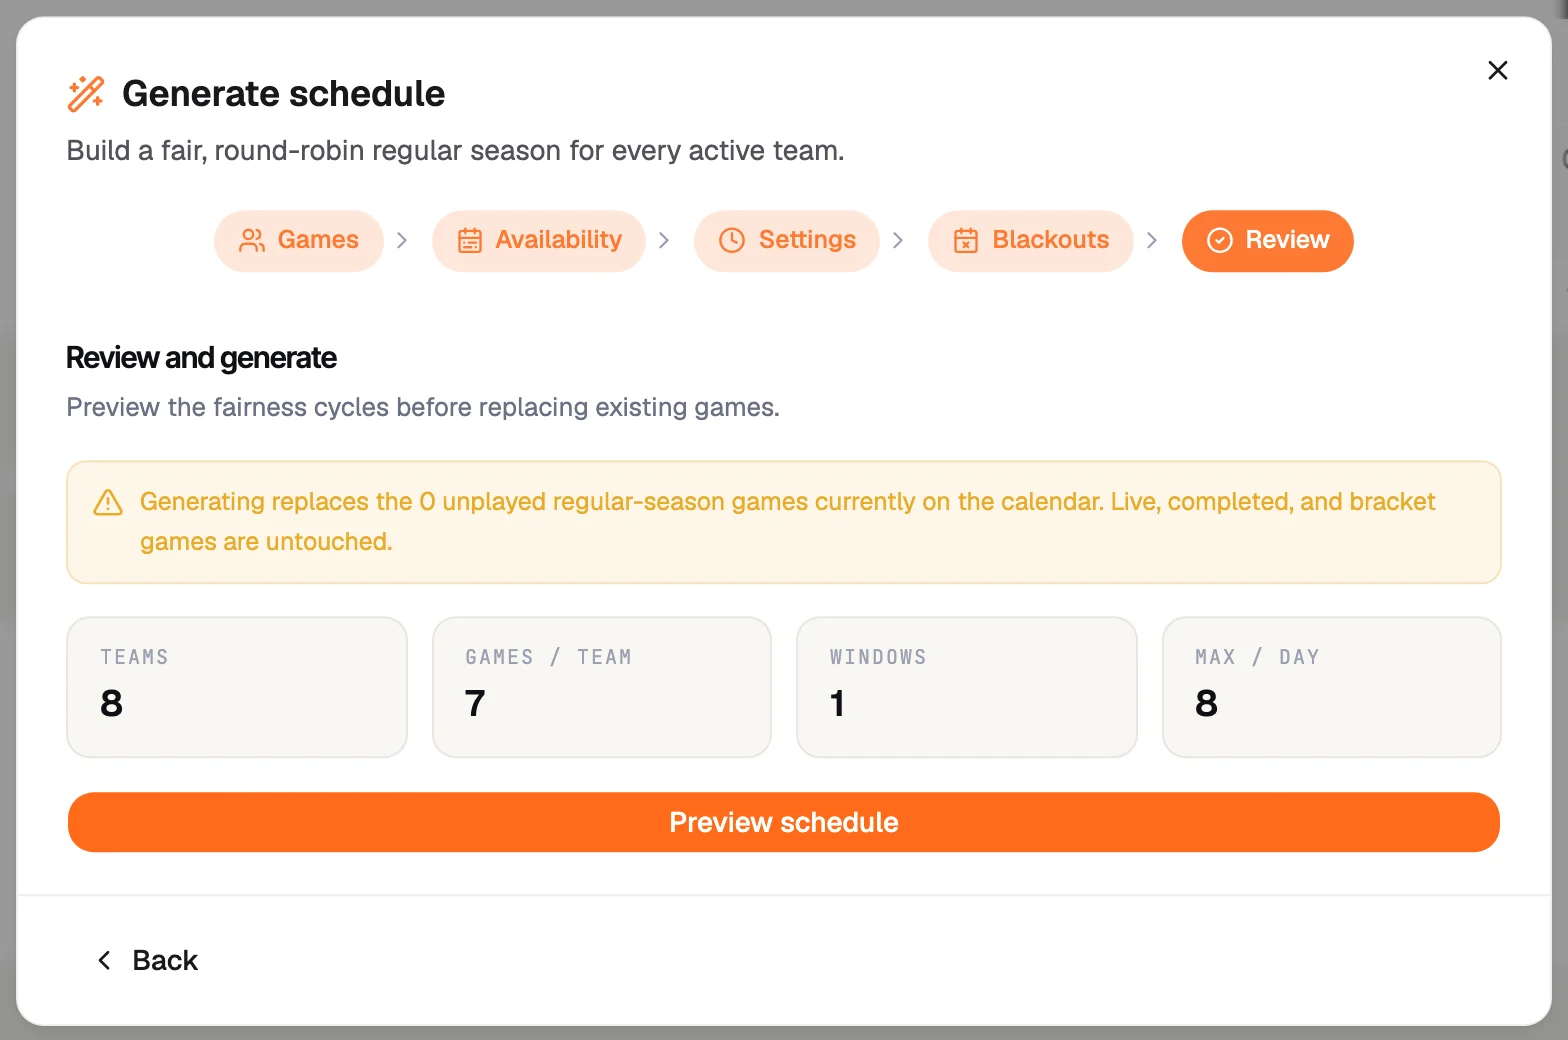
Generate, and the season lands on the calendar: nine weeks of Sunday nights, four games each, every one inside the 6:00–10:00 PM window. Players see it in their app the moment it exists.
FinallyPlayoffs and running the season
From here the competition mostly runs itself, and your job narrows to three things.
Scoring games
Open a game and score it live from a phone or tablet — web or the mobile app, either one. Scores, standings, and stats update as you tap, and anyone watching the public page sees it happen. If your tracking mode is score only, that is two buttons.
Generating the playoff bracket
One bracket per competition, generated from the Playoffs tab when you are ready. Pick single elimination, double elimination, round robin, or a group stage; seed it manually, from the regular-season standings, from a feeding group stage, or at random. Partial fills get byes automatically. Our bracket guide covers how to choose a size and seed it without starting an argument.
The public page
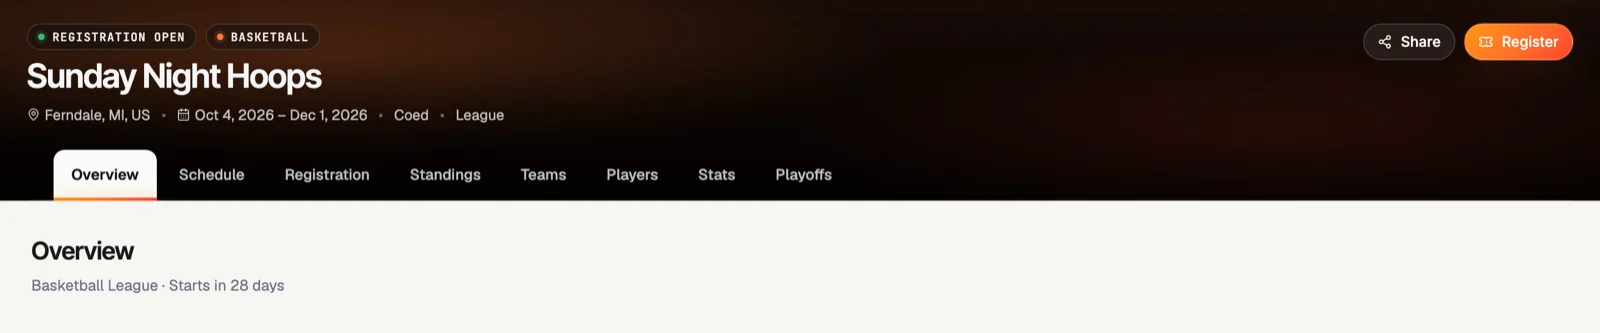
Everything you have set up shows up in one place your players and their families can open without an account: overview, schedule, registration, standings, teams, players, stats, and playoffs.
The short version
- The only choice that is hard to undo is how people register — settle it before you publish.
- The sport is fixed after creation. Everything else is editable in Settings.
- Weekly game times are a fence, not a schedule: count your slots before you set your team cap.
- Pick the smallest stat-tracking mode you will actually sustain for a whole season.
- Publish paid competitions early — Stripe onboarding is not instant.
- Create teams before you generate a schedule, and always preview before you commit.